Showing posts with label mexican. Show all posts

Thursday, November 4, 2010

Arriba! Mexican Shredded Beef!

You know when you buy a piece of meat on sale and you maybe cut it in half and freeze one-a the halves for later use? Can’t it be so easy to forget about that frozen hunk-a meat?! When we recently bought a rather large pot roast on sale, I vowed that when placed half in a freezer bag that I would not let it go to waste. And this past Sunday, we cooked up that wonder cut of beef and made it into the most succulent, delicious Mexican, shredded beef I’ve ever had. Shredded beef is a great change-up for tacos and nachos, etc. We use many different proteins in our Mexican, hamburger, ground turkey, chicken…but this was SO dang good and we’d always wanted to try it. Besides…after my daughter announced, the last time we had actual pot roast dinner – that she didn’t like pot roast – I knew we had to try something different with it….and you know what? She liked it! Ha!

All you have to do is make up the rub, poke garlic into the meat and toss it all in a crock pot with onions and peppers and leave it for 7 hours. I’m telling you it could not be any simpler! Totally give this a try – you will be glad you did J Yum, yum, yum!

Start by poking a few slits into the roast and filling each one with a peeled clove of garlic….
Spoon all of the rub ingredients into a bowl and mix’em up good – then rub’m all over the meat. Next, slice up the two jalapenos, onion and green pepper... Massage both sides of the roast with the rub, put it in the crock pot, cover with the peppers ands onions and pour in the liquid. It’ll seem like a very small amount if liquid, but trust me….this pot’ll brew up plenty of wonderful ‘juice’!

Cover the pot and go about your busy day for approx 7 hours for a 3 ½ pound roast.

Once it’s done, slap that chunk-a beauty meat down on a cutting board. Trust me, you’ll only need to use a fork to ‘smash’ through the meat as it be practically falling apart on itself – Note…remove any fat and all other ‘oogeys’ as you go! No one wants to bite into a blobbity! Leave the garlic cloves whole...smash through them or remove them – you’re choice. We left them whole – see – there’s one at about 9 o’clock!
Return meat to flavorful, brothy liquid until ready to serve. Depending on what you’re gonna do with it, you may choose to strain the meat (save the broth!) or simply let it drain of into the pot as you use tongs to remove servings of the tender, beef.
Now that your meat is done, you can use it in any way you choose..but here's what we did. We heated up some pinto beans (not refried beans...the whole ones are better here – and placed a few beans and some of the beef on a warmed small corn or flour tortilla.
Then dressed with a little lettuce, cilantro, tomatoes - (and some cheese if you choose) – all that was left to do then was to dig into juicy, beefy heaven!

Mexican Shredded Beef

Ingredients:
3 ½ to 4 pound pot roast
6 cloves garlic – peeled
1 tablespoon paprika
(or smoked paprika)
1 tablespoon celery salt
1 tablespoon garlic powder
1 tablespoon dried parsley
1/2 tablespoon ground black pepper
1/2 tablespoon chili powder
1/2 tablespoon cayenne pepper
1/2 teaspoon seasoned salt
1/2 teaspoon mustard powder
1 large onion, sliced
1 green bell pepper, sliced
2 jalapeno chili peppers, seeded & sliced
4 fluid ounces beer (can sub beef broth or cola)
1 1/2 tablespoons Worcestershire sauce
1 teaspoons liquid smoke flavoring
1 can rotelle tomatoes with chilies and cilantro
1 can green salsa verde

Directions:
Poke as many holes in roast as garlic cloves you have, and push a clove into each hole. Combine all spices in a bowl, mix together and rub all over both sides of meat and place roast in crock pot. Slice onion and peppers and scatter over roast in pot. Combine all liquid/wet ingredients (last 5 ingredients) and pour over veggies & meat in pot. Place lid on crock pot and cook on low setting for 7 hours. Remove meat to cutting board or platter and shred with a fork. Return meat to liquid in pot and keep warm until ready to use. If not using right away, you can keep meat in it’s liquid in the fridge. A thin, top layer of fat will form on top once chilled in refrigerator. Once ready to reheat, you may choose to discard this or you can mix it back in as mixture reheats.

Wednesday, November 3, 2010

Creamy White Chicken Chili

Do any of the following weather conditions apply to where you are right now?

Cold
Dreary
Gray
Rainy
Foggy
Nippy
Pleasantly sunny with a fall bite in the air

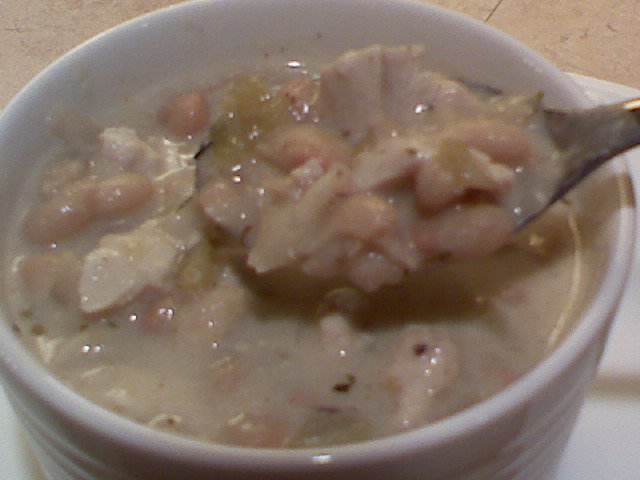
If so, you NEED to make this creamy white chicken chili! It is one of my all tie favorite dishes and I can hardly believe I’ve never featured it here before. I can also hardy believe I don’t have a better picture of it! Crap! While it looks rather washed out above, this chili if FULL of flavor with green chilies, tender chicken, creamy white beans and silky ‘broth’. It is a winner - especially in the winter – but it’s great ANY day.

Creamy White Chicken Chili

Ingredients:
3 boneless, skinless chicken breasts cut into ½ inch pieces
1 medium chopped onion
1 ½ tsp garlic powder
1 T vegetable oil
3 cans (15 ½ oz each) great northern white beans, rinsed and drained
1 can chicken broth
2 cans (those small cans) chopped green chilies
1 tsp salt
1 tsp ground cumin
1 tsp dried oregano
½ tsp pepper’1/4 tsp cayenne pepper
1 cup sour cream
½ cup whipping cream (can use half-n-half)

Directions:
In large skillet, sauté chicken, onion and garlic in vegetable oil until chicken is no longer pink.
Add beans, broth, chilies and seasonings. Bring to a boil. Reduce heat and simmer uncovered for 30 minutes stirring occasionally. Remove from heat**. Stir in sour cream and whipping cream. Heat through. Serve immediately.

Monday, February 1, 2010

Quinoa - Super Keen....

Quinoa (pronounced Keen-Wa.....not quin-o-ah), is becoming all the rage! An awesome source of fiber, I first heard about it a year and a half ago or so but hadn't tried it until this last weekend. I wanted to find a good recipe that incorporated lots of flavor rather than trying it more plain and possibly not liking it when liking it is exactly what I wanted to do! You can find quinoa in the bulk or health food sections of many stores by the bulgar and brown rice etc. The tiny 'pellets' are about the size of two sesame seeds and when browned before adding liquid, smell a little like popcorn! Yum! The recipe I found had a Mexican flair and was a great along side chicken fajitas.
The recipe was pretty basic....quinoa, onion, cilantro, garlic, black beans, frozen corn and chicken broth (called for veg. broth but I only had chicken on hand), as well as olive oil, salt, pepper, cayenne and cumin.
I began by adding the olive oil to a med-high heated pan. I added 1 teasopoon of butter just for a hint of it's taste.
I then added the quinoa - and guess what? Just as I began typing this post, I remembered that I'd read you should rinse your quinoa before cooking it! Yikes! Oh well, I did like the end product anyway...but next time, I'll try rinsing first.
I stirred the quinoa in the oil/butter now and again for about 5 minutes till it smelled flavorful and was nicely browned.
Onions and garlic were added next and cooked for an additional 5 minutes or so.
My camera didn't capture it as well as I'd have liked....but it's getting some nice color here....
Next up came the broth and seasonings & spices - I stirred until well combined...
..then brought it up to a boil...
...then covered it and simmered it on low for 20 minutes.
After the 20 minutes, it had soaked up all the yummy goodness and was light and fluffy.
The frozen corn went in nest (mine had been sitting out since the cooking began though, so it wasn't hard-as-a-rock frozen). Note: when you add in the corn, turn the heat up to at least medium as after the quinoa simmered on a low, it wasn't super hot so you'll need to crank it up a bit to heat the corn thoroughly.
Stir the corn in for a few minutes, then add the black beans and cilantro and stir until heated through - about 2 or 3 minutes.
Once well combined and hot....serve! I had a nice pic of the finished dish in a pretty teal bowl but for some reason it didn't turn out...so there's no 'presentation picutre' for you. But...you get the point of it all anyhoo, right?
My husband loved this dish (fifteen yeaf old daughter...not so much....go figure)...I liked it alot but would've liked it hotter (temp-wise) as I'd transferred it to it's serving dish a few minutes too early before our fajitas were ready. Just know that you wanna keep it hot in it's pan until you're actually ready to serve and eat.
We'll have it again - I'm looking forward to trying it with other flavors besides Mexican. It was less toothy that brown rice and as quick to cook as white rice. Quinoa was a keen change from the everyday!
Mexican Quinoa with Corn and Black Beans
Ingredients:
1 teaspoon vegetable oil
1 teaspoon butter
3/4 medium onion, chopped
3 cloves garlic, peeled and chopped
3/4 cup uncooked quinoa
1 1/2 cups chicken broth
1 teaspoon ground cumin
1/4 teaspoon cayenne pepper
salt and pepper to taste (1/4 teas. of each)
1 cup frozen corn kernels
2 (15 ounce) cans black beans, rinsed and drained
1/2 cup chopped fresh cilantro
Directions
Heat oil and butter over medium-high heat and add quinoa, stirring for five minutes until it begins to brown. Add onions and garlic and cook/stir for an additional 5 minutes. Pour in broth and seasonings, then cover and reduce heat to low - simmer 20 minutes. Add in forzen corn, and increase heat to medium - cooking until corn is heated through. Add black beans and cilantro then cook additional 3 minutes until dish as a whole is steaming hot. Serve immediately.

Tuesday, August 18, 2009

South of the border via Ridgefield, Washington....


Man, I love chicken enchiladas! They’re cheesy and ooey-n-gooey and just dang yummy with a little spicy kick! I decided to make them this past weekend as my husband and I had picked up a couple of whole chickens at the store – they were so cheap! We actually bought 4 and I froze two – but I tell ya what…we paid less than 10 bucks for all four birdies. That can hardly be beat. Anyhoo….he put two chickens on the bbq and smoked’em for a good couple of hours. The meat was tender, juicy (that means moist, not floppy...sometimes too juicy a meat can seem floppy and raw-ish, ya know?) and flavorful – oh my gosh it was just perfectly cooked! Let me just say too that he made the roasted red taters that night for dinner as well and you know I hate to say it but they were better than mine! Oh well...that’s actually super cool ‘cause now there’s a meal that I know will be killer and I don’t have to do a thing save for tossing a salad. It’s nice to let someone else do the cookin’ from time to time. I always thought I’d hate that – I’m such a control freak in the kitchen! Oops…got off track – cut to the chase…I used the leftover chicky for enchiladas ;-)

And oh yeah….funny I should say I’m a control freak because this next part will totally contradict that statement. I don’t have a recipe for my chicken enchiladas, however, I can tell you how I make them and give you measurements like ‘about half a container of this or that’ because that’s how I make’m myself! Enchiladas are really a thing that you can adjust and tweak to your liking anyway….more chilies, less cheese, add in salsa etc, etc.

So – if you've got some leftover chicken taking up space in yer fridge these enchiladas are a big ol’ tummy-pleasing option! Oh – and I had enough filling to make two pans of five enchiladas each (I froze one). You can adjust this, or totally stuff your more full or just put more enchiladas in a bigger pan.

Chicken Enchiladas

Ingredients:
Chunked/shredded chicken meat from about one whole chicken
Approx. 1, 16 oz container of sour cream - divided
2 bricks cream cheese - softened
Two regular-sized (10 -12 oz.) cans of enchilada sauce
1, 7 oz. can diced green chilies (or use two cans if you like – heck...make one can dice jalapenos for extra heat!)
Ground cumin
Salt-n-pepper
½ medium onion – small dice
3 to 4 cups of shredded cheese, half jack, half cheddar
Approx. 10 small flour tortillas (8” diameter)
1, 4 – 6 oz can sliced black olives (optional)

Directions.....

Pull the chicken meat apart and set aside – don’t shred the chicken too fine, you want chunks of meat, not a tuna fish-like consistency.
In a large bowl, put half the container of sour cream, both bricks of cream cheese, ½ to 2/3 of one can of enchilada sauce, the green chilies, several shakes of ground cumin and pepper and about ¼ to 1/3 teaspoon salt (give this mixture a few drops of Tabasco or cayenne if you like more heat). Combine all ingredients well….
...then add the onion....
…and half of the full amount of shredded cheese.
Mix everything thoroughly and FOLD in the chicken. Again, we don’t want a tuna fish consistency so don’t over-stir once the chicken is added in.
Take a tortilla and spoon on approx 1/3 cup of the mixture (remember, this amount of filling made ten enchiladas for me. So, if you like, ‘cut’ the filling in half with a rubber scraper, then use 1/5th of each half to fill five tortillas at a time to make sure you don’t run short.

Fold the two sides over the filling and place seam-side down in a 9 x 13 pan. Oh! Important thing to do that I didn’t do (but I fixed marginally well) – See two pics down?....the step of mixing sour cream with the enchiladas sauce? Before you lay the filled/rolled tortillas in the pan, ladle a small amount of this sauce into the pan and spread it evenly over the bottom of the pan. Not a lot of sauce…just enough so the enchiladas aren’t sitting on a baron surface. You could also just spray the pan with non-stick spray if you like.

Okay…all tortillas filled and in the pans. Again, you could put all in one large lasagna pan if you wish, or use two and cook both separately or freeze one for a future dinner like I did.
As I stated earlier, you mix together the remainder of the container of sour cream and the rest of the enchilada sauce (1 can plus about ½ of the opened can)…..
..then spread half of the mixture over one pan of enchiladas (save the rest for the other pan or use it all if you’re cooking all of the enchiladas at the same time).

Chop three green onions….
..then top the whole thing with the onions, the can of olives and the remaining shredded cheese (note: there is only enough remaining cheese for one pan of enchiladas….I didn’t think I’d have so much filling that I’d be making two pans when I started shredding, so shred another cup or so if you’re doing all ten).

Now – bake the sucker at 350 for a good 40 minutes – longer if it’s been chilled...lots longer. Like almost an hour and a half. You want the cheese bubblin’ on the edges and it molten inside!

You want it lookin’ like this….

…and this….YUM!

Hungry yet?