Showing posts with label Dinner. Show all posts

Tuesday, December 14, 2010

Melty, Cheesy, Beefy, Juicy, Crispy Patty Melt

Hello, delicious patty-melt-on-sour-dough-because-I-don’t-like-rye….you are beautiful ;-)

Why no….I have no idea why my ass is currently 3 feet wide….do you?

Who doesn’t love a hot, melty, stringy, cheesy, crispy, grilled……..anything?! I didn’t grow up a fan of the patty melt – I hate rye bread. But at this stage of the game of life, I should consider myself lucky that I didn’t thank about swapping breads long ago- ‘cuz my caboose would be even bigger!

I don’t think y’all need to be told how make a patty melt – after all it’s just a patty of juicy ground beef (fyi, press it thin and make it a good inch all-around bigger than the bread if your meat is 80/20); lip-smackingly caramelized, grilled onions; Swiss cheese, 1,000 Island dressing and good bread. Yes, yes…..traditionally rye, but in this case – it as sour dough….about ¾ inch thick sour dough. The loaf was heavy, but we could tell the bread was ‘airy’ which told me ‘this will get totally crispy on the grill!’ (as opposed to a more dense bread that could get soggy on the inner sides).

What makes a patty melt different from a ‘grilled cheese with hamburger in it’? I don’t really know – but I can tell you this: it IS different! I think the trick to this awesome, juicy, cheese-oozing sandwich was time and temp on the griddle. The heat was not too high (you don’t want your sandwich to burn before the inside has gotten sufficiently melty) and not too low (butter on the outside takes so long to melt is hardly gets crisp ands golden…just more yellow). You want a good, medium heat and then, if you have a cast iron press (I used a cast iron bacon press), layh it on top of the sandwich to help concentrate that heat and get the most crispy, uniformly melted, hot sandwich ever!

Yeah, yeah, I know….my bacon press allowed me to create a ‘poor mans panini press’. If you have an actual panini maker, I’m sure this post will sound rather like a grandparent telling you how to crank up the old Victrola – but I beg you…indulge me.

Thanks much ;-)

You know…if you were making three or four sandwiches on a griddle, I imagine you could press the tips down with a bog ol’ cast iron pan and do all four at once! Who needs Oprah’s favorite Breville Panini Makes (at $119) when you can slap a pan on yer sammich?!

Anyhoo – on one of these cold days, treat yourself to a toasty hot, cheesy, dreamy, juicy patty melt – pick your own bread………….you know I will :-)

Tuesday, November 16, 2010

World's Best, Loaded, Baked Potato Soup!

I went to Heaven twice this past weekend. The first time was when my sister and I made this most delicious, loaded, baked potato soup. The second time - was when I made the soup again the next day! I'd sent a bunch home with my big sis since we'd cooked it up together - it's so much more fun to share the wealth ;-) But by the time my husband put clams and a handful of bay shrimp in his half of what was left, and my daughter and I had a bowl each - it was gone! And I have to tell you....this soup is SO freaking amazing I had no choice but to make it again.
Not only is this soup PERFECT when made to the letter of the recipe below - but I believe it could very well be the grand base for a million other soups (*note- the original recipe calls for whole milk - the first go-'round we used 2% as I never buy whole milk and it was PLENTY thick. Round two, I used skim as that's what I always buy and it was a thick and velvety as the first batch - trust me). I'd first halve the amount of potatoes in it and I'd probably dice them whereas in the original recipe, you simply put the scooped out chunks tater of any size right into the pot. Depending on what other ingredients I'd add, I also might use my immersion blender to make the soup silky smooth with tates rather than chunky at all. BUT...think of the varieties of soups you could make just by tossing in your favorite ingredients! Like I said, the hubs threw in a can of clams and a small handful of bay shrimp to create Slumgullion - but what I wanna try is a bag of frozen super sweet corn and a can or two of green chilies! But what about leftover ham, or sweet or spicy sausage? Maybe roasted garlic cloves or roasted peppers and onions - Holy Moly the list is endless...ENDLESS I'M TELLING YOU! Besides the fact that I adore this soup 'as is', it may be my my newest fave recipe only because it's SO versatile and I can make it the way I want it when the moods strikes me..whatever my mood might be! If I've ever wanted you to try ANYthing on this site before...this is THE one thing I beg you to cook up. It's super easy, really fast and insanely good!

Loaded Baked Potato Soup

Ingredients:
9 baking potatoes
2/3 cup butter
2/3 cup all-purpose flour
6 cups skim milk (can use 2% or whole as well)
1/2 tablespoon salt
1 teaspoon ground black pepper
1/2 cup bacon bits
4 green onions, chopped
10 ounces shredded Cheddar cheese
1, (8 ounce) container sour cream

Directions:
Prick potatoes with a fork and cook in the microwave until soft baked (you can do this step ahead of time if you choose). Scoop out the baked potato flesh into bowl. In a large saucepan over medium heat, melt butter. Whisk in flour and cook for about 2 minutes, stirring constantly till mixture bubbles, then cook a minute more to dispel a flat 'flour taste'. Whisk in milk, a little at a time, stirring constantly (will be very thick when first few additions of milk are whisked in - just keep whisking and adding in all milk). Stir until this mixture begins to thicken - about 5 minutes. Add in potatoes, salt, pepper, bacon bits, green onions and the cheese. Stir to incorporate. Add in sour cream and heat through. Serve topped with additional bacon, onions and cheese if desired.

Thursday, November 4, 2010

Arriba! Mexican Shredded Beef!

You know when you buy a piece of meat on sale and you maybe cut it in half and freeze one-a the halves for later use? Can’t it be so easy to forget about that frozen hunk-a meat?! When we recently bought a rather large pot roast on sale, I vowed that when placed half in a freezer bag that I would not let it go to waste. And this past Sunday, we cooked up that wonder cut of beef and made it into the most succulent, delicious Mexican, shredded beef I’ve ever had. Shredded beef is a great change-up for tacos and nachos, etc. We use many different proteins in our Mexican, hamburger, ground turkey, chicken…but this was SO dang good and we’d always wanted to try it. Besides…after my daughter announced, the last time we had actual pot roast dinner – that she didn’t like pot roast – I knew we had to try something different with it….and you know what? She liked it! Ha!

All you have to do is make up the rub, poke garlic into the meat and toss it all in a crock pot with onions and peppers and leave it for 7 hours. I’m telling you it could not be any simpler! Totally give this a try – you will be glad you did J Yum, yum, yum!

Start by poking a few slits into the roast and filling each one with a peeled clove of garlic….
Spoon all of the rub ingredients into a bowl and mix’em up good – then rub’m all over the meat. Next, slice up the two jalapenos, onion and green pepper... Massage both sides of the roast with the rub, put it in the crock pot, cover with the peppers ands onions and pour in the liquid. It’ll seem like a very small amount if liquid, but trust me….this pot’ll brew up plenty of wonderful ‘juice’!

Cover the pot and go about your busy day for approx 7 hours for a 3 ½ pound roast.

Once it’s done, slap that chunk-a beauty meat down on a cutting board. Trust me, you’ll only need to use a fork to ‘smash’ through the meat as it be practically falling apart on itself – Note…remove any fat and all other ‘oogeys’ as you go! No one wants to bite into a blobbity! Leave the garlic cloves whole...smash through them or remove them – you’re choice. We left them whole – see – there’s one at about 9 o’clock!
Return meat to flavorful, brothy liquid until ready to serve. Depending on what you’re gonna do with it, you may choose to strain the meat (save the broth!) or simply let it drain of into the pot as you use tongs to remove servings of the tender, beef.
Now that your meat is done, you can use it in any way you choose..but here's what we did. We heated up some pinto beans (not refried beans...the whole ones are better here – and placed a few beans and some of the beef on a warmed small corn or flour tortilla.
Then dressed with a little lettuce, cilantro, tomatoes - (and some cheese if you choose) – all that was left to do then was to dig into juicy, beefy heaven!

Mexican Shredded Beef

Ingredients:
3 ½ to 4 pound pot roast
6 cloves garlic – peeled
1 tablespoon paprika
(or smoked paprika)
1 tablespoon celery salt
1 tablespoon garlic powder
1 tablespoon dried parsley
1/2 tablespoon ground black pepper
1/2 tablespoon chili powder
1/2 tablespoon cayenne pepper
1/2 teaspoon seasoned salt
1/2 teaspoon mustard powder
1 large onion, sliced
1 green bell pepper, sliced
2 jalapeno chili peppers, seeded & sliced
4 fluid ounces beer (can sub beef broth or cola)
1 1/2 tablespoons Worcestershire sauce
1 teaspoons liquid smoke flavoring
1 can rotelle tomatoes with chilies and cilantro
1 can green salsa verde

Directions:
Poke as many holes in roast as garlic cloves you have, and push a clove into each hole. Combine all spices in a bowl, mix together and rub all over both sides of meat and place roast in crock pot. Slice onion and peppers and scatter over roast in pot. Combine all liquid/wet ingredients (last 5 ingredients) and pour over veggies & meat in pot. Place lid on crock pot and cook on low setting for 7 hours. Remove meat to cutting board or platter and shred with a fork. Return meat to liquid in pot and keep warm until ready to use. If not using right away, you can keep meat in it’s liquid in the fridge. A thin, top layer of fat will form on top once chilled in refrigerator. Once ready to reheat, you may choose to discard this or you can mix it back in as mixture reheats.

Wednesday, November 3, 2010

Creamy White Chicken Chili

Do any of the following weather conditions apply to where you are right now?

Cold
Dreary
Gray
Rainy
Foggy
Nippy
Pleasantly sunny with a fall bite in the air

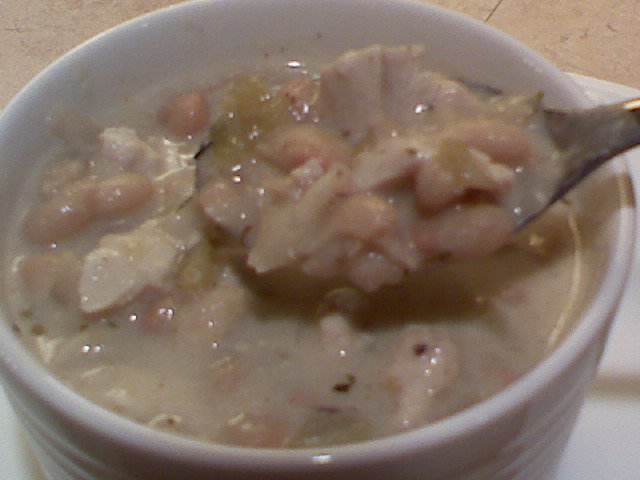
If so, you NEED to make this creamy white chicken chili! It is one of my all tie favorite dishes and I can hardly believe I’ve never featured it here before. I can also hardy believe I don’t have a better picture of it! Crap! While it looks rather washed out above, this chili if FULL of flavor with green chilies, tender chicken, creamy white beans and silky ‘broth’. It is a winner - especially in the winter – but it’s great ANY day.

Creamy White Chicken Chili

Ingredients:
3 boneless, skinless chicken breasts cut into ½ inch pieces
1 medium chopped onion
1 ½ tsp garlic powder
1 T vegetable oil
3 cans (15 ½ oz each) great northern white beans, rinsed and drained
1 can chicken broth
2 cans (those small cans) chopped green chilies
1 tsp salt
1 tsp ground cumin
1 tsp dried oregano
½ tsp pepper’1/4 tsp cayenne pepper
1 cup sour cream
½ cup whipping cream (can use half-n-half)

Directions:
In large skillet, sauté chicken, onion and garlic in vegetable oil until chicken is no longer pink.
Add beans, broth, chilies and seasonings. Bring to a boil. Reduce heat and simmer uncovered for 30 minutes stirring occasionally. Remove from heat**. Stir in sour cream and whipping cream. Heat through. Serve immediately.

Monday, April 26, 2010

The Best Burger Ever!


OMG – Look at this thing of beauty! We had gilled hamburgers over the weekend and I’m not ashamed to say – we had them twice. They were THAT good! I love that something as simple as a terrific, juicy burger can instantly make everything right with the world – at least till you swallow the last bite!
The hubs and I found these awesome buns in the bakery department of our local market (Fred Meyer – aka Kroger in other parts of the country). They had melted cheddar cheese and sliced jalapenos on them and the very second we saw them we said –“We gotta have burgers on those tonight!” We’d been planning on making a Mexican lasagna, but the very site of these beautiful buns whisked that idea away in an instant!

The buns were soft on the inside and just a slight crust on the outside. The jalapenos gave each bite just a tiny hint of heat and jalapeno flavor. They were – in a word – perfect.

We cooked up a few slices of bacon, sliced some sweet onion and red, ripe tomato and I shredded some lettuce – I LOVE shredded lettuce on a burger WAY more than big ol’ flat lettuce leaves – there’s more crunch!
I put the tomato and onion between the burger patty and bottom bun. All those fresh veggies on top of a slice of melted cheese can get too slippery – not that a messy, drippy burger isn’t terrific, but it’s nice when it can all stay together too – you get every flavor in every bite. I suppose it doesn’t photograph as pretty – but hey, just check out that close-up shot, above!

Mmmm…wish I had one now! Next chance you get - make yourself a great burger - there is nothing better!

Monday, April 19, 2010

Spicy 'Chinese Take-Out' Green Beans

My baby's 16th birthday is coming up and she's requested her favorite dish - homemade pork fried rice. We're expecting quite a few people at her party....about 22 to 26 - so we're filling in the dinner with egg rolls and salad and, deciding we needed one more item to round out the whole meal - I went searching the internet for an 'asian-type' green bean dish. We all like beans and can take some spice so that seemed the perfect fit. I found a few different recipes, and morphed them to fit our palette. I made them Friday night to test'em out....they were so good! Two friends happened by while I was making them and one said they were the best beans he'd ever eaten! So - need a really good and spicy (not too spicy) green bean? Here you go ;-)Ingredients are simple - you probably have all of these in your kitchen already... Oyster sauce, sesame oil, green beans (blanched), soy sauce (I like low sodium), red pepper and garlic (and salt and pepper of course) - oh...and red pepper flakes too, I just forgot to put them in the pic!
In a medium skillet over medium high heat, heat the sesame oil and add the red pepper and stir in hot oil for approx 2 minutes - add garlic and stir another minute. Next, add in the blanched green beans and toss. Pour in oyster & soy sauce and season with salt and pepper and continue to toss beans to coat and heat them through - about 4 to 5 minutes.
Serve hot alongside your favorite meat or fish and other side dish :-) I promise the yum-factor on these beans is WAY high!
Spicy 'Chinese Take-Out' Green Beans
Ingredients:
1 lb green beans - blanched (add beans to boiling water - boil for 4 - 5 mins then transfer beans to ice water bath to cool and stop cooking. Remove cooled beans from ice water to colander to sit until ready to use)
1/2 T sesame oil
1/4 of a red pepper - finely diced
3 to 4 big cloves garlic - minced
2 T oyster sauce
1 T low sodium soy sauce
salt and pepper to taste
teaspoon or two of red pepper flakes (opptional)
Directions:
Pour sesame oil into hot medium skillet and add red pepper, stir-frying for about 2 minutes - add garlic and cook for additional 1 minute. Add in blanched green beans and toss. Pour in oyster & soy sauce and toss well to coat beans. Taste and season with salt and pepper. Add in red pepper flakes if you choose and continue to toss until beans are heated through - approx 4 to 5 minutes. Serve hot!

Tuesday, February 16, 2010

Dinner From The Heart.....

Love comes in many forms and when it's in the form of food - I'm happy, happy! This is the meal I made for the hubs, my daughter and my mom for Valentine's Day - and I got 'hearts' in wherever I could! Individual heart-shaped meatloaves (perfect becasue I LOVE meatloaf!), heart-shaped breadsticks, my special mashed tates with heart-shaped butter and a new broccoli dish that I knew we'd all love!
I think making a meal, such as this, extra special comes in the details. Like these heart-shaped butters. I just cut a pat of butter from a little-cooler-than-room-temperature butter and used a very small, heart cookie cutter to cut out the shape. After all were formed, I covered them and put them in the fridge until I was ready to place them into the piping hot mashed taters.
I bought refridgerated breadsticks (garlic ones...but the come in plain as well), twisted them as instructed, then formed them into hearts too! Once they were baked, I brushed each with hot, melted butter. Did I meniton there was no dieting in sight on this Valentine's Day?!
I DO have to say I make a bitchin' meat loaf (recipe to come at a later date), but instead of making one large one that would normally be served in slices, I took a good handful of the meat mixture and molded it into a heart shape, chilled them, then baked them on a sheet pan for about 40 minutes. With the tangy and delicious, red glaze, the look perfect for Valentine's Day!
Look for the recipe for this to-die-for broccoli recipe to come soon as well. I'll do a step-by-step on this one. I can hardly wait to have it again. I combines both roasted broc as well as flourettes that have been cooked with cream and garlic (then creamed with an immersion blender). The flavor is incredible!
I can't believe I forgot to snap a pic of this heavenly dessert before I scooped off the first serving! This is called Coure la Creme and it is the silkiest, creamiest, lightest & fluffiest thing you'll ever eat! It's super easy - and although it does call for a certain heart-shaped, ceramic mold, the mold isn't a must - which means everyone can have the opportunity to create this wonderfully light dessert that's served with raspberry sauce. It was the perfect ending to a LOVEly Valentine's Day dinner.
I hope your Valentine's Day was fillled with love!

Monday, February 8, 2010

Monday, February 1, 2010

Quinoa - Super Keen....

Quinoa (pronounced Keen-Wa.....not quin-o-ah), is becoming all the rage! An awesome source of fiber, I first heard about it a year and a half ago or so but hadn't tried it until this last weekend. I wanted to find a good recipe that incorporated lots of flavor rather than trying it more plain and possibly not liking it when liking it is exactly what I wanted to do! You can find quinoa in the bulk or health food sections of many stores by the bulgar and brown rice etc. The tiny 'pellets' are about the size of two sesame seeds and when browned before adding liquid, smell a little like popcorn! Yum! The recipe I found had a Mexican flair and was a great along side chicken fajitas.
The recipe was pretty basic....quinoa, onion, cilantro, garlic, black beans, frozen corn and chicken broth (called for veg. broth but I only had chicken on hand), as well as olive oil, salt, pepper, cayenne and cumin.
I began by adding the olive oil to a med-high heated pan. I added 1 teasopoon of butter just for a hint of it's taste.
I then added the quinoa - and guess what? Just as I began typing this post, I remembered that I'd read you should rinse your quinoa before cooking it! Yikes! Oh well, I did like the end product anyway...but next time, I'll try rinsing first.
I stirred the quinoa in the oil/butter now and again for about 5 minutes till it smelled flavorful and was nicely browned.
Onions and garlic were added next and cooked for an additional 5 minutes or so.
My camera didn't capture it as well as I'd have liked....but it's getting some nice color here....
Next up came the broth and seasonings & spices - I stirred until well combined...
..then brought it up to a boil...
...then covered it and simmered it on low for 20 minutes.
After the 20 minutes, it had soaked up all the yummy goodness and was light and fluffy.
The frozen corn went in nest (mine had been sitting out since the cooking began though, so it wasn't hard-as-a-rock frozen). Note: when you add in the corn, turn the heat up to at least medium as after the quinoa simmered on a low, it wasn't super hot so you'll need to crank it up a bit to heat the corn thoroughly.
Stir the corn in for a few minutes, then add the black beans and cilantro and stir until heated through - about 2 or 3 minutes.
Once well combined and hot....serve! I had a nice pic of the finished dish in a pretty teal bowl but for some reason it didn't turn out...so there's no 'presentation picutre' for you. But...you get the point of it all anyhoo, right?
My husband loved this dish (fifteen yeaf old daughter...not so much....go figure)...I liked it alot but would've liked it hotter (temp-wise) as I'd transferred it to it's serving dish a few minutes too early before our fajitas were ready. Just know that you wanna keep it hot in it's pan until you're actually ready to serve and eat.
We'll have it again - I'm looking forward to trying it with other flavors besides Mexican. It was less toothy that brown rice and as quick to cook as white rice. Quinoa was a keen change from the everyday!
Mexican Quinoa with Corn and Black Beans
Ingredients:
1 teaspoon vegetable oil
1 teaspoon butter
3/4 medium onion, chopped
3 cloves garlic, peeled and chopped
3/4 cup uncooked quinoa
1 1/2 cups chicken broth
1 teaspoon ground cumin
1/4 teaspoon cayenne pepper
salt and pepper to taste (1/4 teas. of each)
1 cup frozen corn kernels
2 (15 ounce) cans black beans, rinsed and drained
1/2 cup chopped fresh cilantro
Directions
Heat oil and butter over medium-high heat and add quinoa, stirring for five minutes until it begins to brown. Add onions and garlic and cook/stir for an additional 5 minutes. Pour in broth and seasonings, then cover and reduce heat to low - simmer 20 minutes. Add in forzen corn, and increase heat to medium - cooking until corn is heated through. Add black beans and cilantro then cook additional 3 minutes until dish as a whole is steaming hot. Serve immediately.