Showing posts with label breakfast. Show all posts

Tuesday, October 26, 2010

Maple Bacon Pan-Cake

So many great things about this dish…. It’s easy, it’s fast, it’s cheap, it’s something different and it’s good! It’s got the sweet/salty thing going on and what’s better than that?

This hot and tasty breakfast dish came to me from allrecipes.com about two months ago. I clipped it together with all the other recipes I’ve printed off myriad recipe sites that I one day mean to make – but this one called to me way more than any of the others. I mean, the thought of bacon and maple syrup together was enough to make me print it in the first place, but those things nestled in a hot, oven baked pan-cake – with cheese no less…finally this past Sunday I could ignore it no longer!

I must admit – I changed things up just a titch…I had ‘Hormel Real Bacon Pieces’ on hand so I used those instead of cooking up actual, raw bacon – which I didn’t have. I don’t think it made one bit of difference with the exception of it being faster and easier than if I’d had fried up the bacon myself. Also, the original recipe calls for cheese in it as well as on it – but I didn’t want my daughter to freak out about the se cheese before she had a chance to like this dish, so I left it off the top. She never knew it was inside and even though I figured I’d tell her afterward, I thought, “why?” Because I want her to continue to like it! Matter of fact, she asked me to use sausage next time in place of the bacon……done ;-)

Mapley-Bacony Pan-Cake

Ingredients:
8 oz/ 1 cup bacon (REAL bacon ‘bits’ NOT ‘Bacos! Or actual cooked bacon, chopped into small pieces) - divided
1 cup baking mix – like Bisquik
¾ cup cheddar cheese – shredded
½ cup milk
1/3 cup maple syrup
2 T white sugar
2 eggs, slightly beaten
Additional maple syrup for drizzling

Directions:
Preheat oven to 250 degrees and spray a 9” pie plate with non-stick cooking spray. Cook and crumble/chop bacon if necessary. Mix all ingredients – save for 1/3 of the bacon – in nixing bowl until combined. Pour into pie dish and bake on middle rack of oven for 12 minutes. Sprinkle top of pancake with remaining 1/3 cup bacon and bake an additional 5 to 7 minutes or until puffed and very light golden brown. Meanwhile, warm the additional maple syrup. Serve ‘pan-cake’ hot drizzled with hot maple syrup.

Tuesday, October 12, 2010

Simple-Ly Perfect Sunday Mornings

(*Note* - the font is all screwy today! Can't get it all the same! I know it probably doesn;t mater to you...but this is me we're talking about! ;-) - okay...on with the show...

Don’t you love Sunday mornings? With the exception of peeping through heavy lids and realizing, “Ahhhhh….it’s Saturday”, Sunday mornings are very hard to beat. From the moment I open my eyes, I know that a quiet house, a hot pot of coffee and the Sunday paper will soon be all mine as I curl up in my favorite corner or the couch donning fuzzy slipper socks with a cozy blanket draped across my lap.

The other nice thing about Sunday mornings….breakfast. Saturday’s don’t get much breakfast, if any ‘cuz there’s stuff to do – gotta get ready for the day and head out on those errands or dig into the house cleaning. But Sundays cal for something extra….something hot and savory, maybe a special sweet from time to time - even it’s as simple as a couple of egg whites and toast, there IS breakfast that MUST be had.

This past Sunday I cut up and cooked 6 slices of thick-sliced bacon and tossed it’s chewy, smoky goodness into fluffy, barely creamy, scrambled eggs. I added a little sliced green onion for a bit freshness and an extra crisp, English muffin toasted just-so. Simple, hot, full of flavor and delicious.

A perfect, cozy breakfast to crown my perfect, cozy, Sunday morning,

Thoroughly enjoy each and every one of your mornings :-)

Monday, June 14, 2010

Fast & Easy Cinna-Minnys

Who doesn’t love a hot, gooey cinnamon roll?! My daughter and her BFF love them. Said BFF spends one night at our house just about every weekend and we really like having her. I know lots of moms/parents let kids fend for themselves as far as breakfast when a sleepover has occurred, but I’ve never felt comfortable with that. As a mom I feel like it’s my job to start their day off nicely with a hot breakfast. Not necessarily a nutritious breakfast, but a hot one that they’ll like ;-) While they enjoy pancakes, waffles, french toast and eggs/browns/bacon, by far they like hot cinnamon rolls the most. My daughter’s nickname is Minny, so, seeing as they’re her favorite, I named the tiny treat after her!. I’ve made real, yeast, homemade cinnamon rolls a few times and they are heaven – but that means having lots of cinnamon rolls around the house for days which is really bad for me! Then, I fell into the habit of buying the Pillsbury ones in the can – these are fine, but they’re far from great. So….a few months ago, not finding a can of the regular cinnamon rolls in the fridge, yet seeing a can of crescent rolls, I was able to make the most melt-in-your-mouth, fast & easy cinnamon rolls that have become the girl’s top choice for breakfast (and a side of bacon never hurts). So, still with a little help from Pillsbury, I present my Fast & Easy Cinna-Minnys! FYI – because I made these up on a whim, measurements are approximate. There is really no way to screw these up though, so check out how I make’m and then have faith in yourself to throw them together :-)
You’ll need 1 tube of Pillsbury Crescent rolls. The kind shown above is the new, one full sheet kind – but you can buy the regular rolls, just unroll them into one big sheet and press them together at the seams. Also gather some brown sugar, cinnamon and butter.
The rolls are pretty buttery tasting already, but begin by spreading a very thin layer of butter on the dough just to help the filling adhere a little better.
You can see the butter is very thin – I bet there’s only about a 1 ½ tablespoons total on there. Also, leave a good half inch unbuttered along one of the long sides to make sealing easier after rolling.
Next comes the filling – Yum! My filling is simply brown sugar and cinnamon. Again, I’ve never measured, but I’m gonna say I use about 1/3 cup (packed) or ½ cup un packed brown sugar and approx 1 ½ tablespoons of good cinnamon. Stir the two ingredients together well, in a bowl, then pour it down the middle of the buttered dough.

Then spread the filling mixture evenly from end to end and to the edge of one, buttered, long side leaving the other, unbuttered long edge free of filling.
Starting at the long side where the filling is right up to the edge, begin rolling the dough – taking care to keep the roll as snug as possible (as opposed to loose and floppy). Then, pinch and seal the dough along the unbuttered edge. Seal it well so the rolls don’t Unroll while baking.
Cut the into individual slices – about ¾ inch thickness. Using a good, serrated knife and a sawing motion makes this a snap.
Place each slice on a baking sheet. I use well-honed stoneware to bake my rolls – if you’re going to use a metal baking sheet, you’d do well to use parchment paper or a silpat as the sugary filling will be a nightmare for you, burning the rolls on the bottom and making cleaning impossible!
Yes these cinnamon rolls are smaller than the ones you pop out of a can, but you get way more and I guarantee, they taste WAY better! Put your filled baking sheet into a preheated 350-degree oven for 12 – 14 minutes. Again, I’ve only ever baked these on my stoneware, so if using a regular backing sheet, please keep eye on them – checking for doneness after ten minutes the first time you make these – then increase baking time by one or two minute intervals until light golden brown.
Mmmmm….baking is done….
Puffy, tender and all cinnamonny in the middle! See the filling that oozed? That’s why you’ll need a silpat or parchment on a metal sheet!
Now….what’s a cinnamon roll without cream cheese icing? It’s not complete – that’s what!
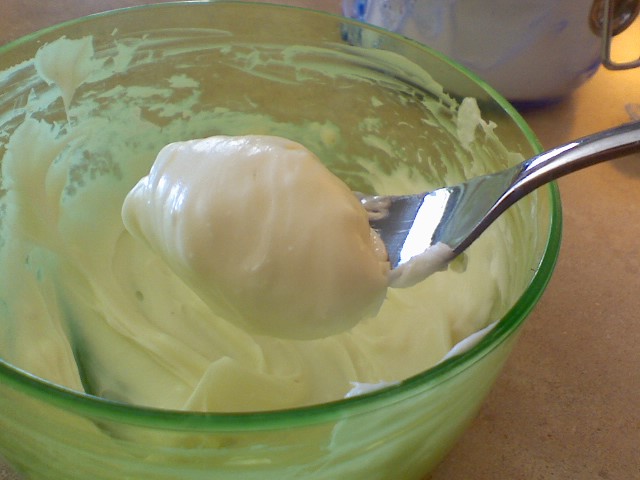
This is super simple…grab a bowl and dump in ¼ brick of cream cheese (nuked to make it soft), 2 or 3 teaspoons of butter, about 3 tablespoons of powdered sugar and a tiny splash of vanilla. Stir it up good with a fork or mini-whisk…..
….until velvety smooth and use an knife or small off-set spatula to smear about a half teaspoon-worth if icing on each hot cinnamon roll.
Eat’m while there hot! Soooo good! I tried to take a picture of one of the little, delicious, cinnamon treasures – but the hot filling was burning my fingers before I could get a picture worth saving! But trust me – these are dreamy, tender & flaky and full of cinnamony-brown sugar & buttery flavor. The twang of the cream cheese icing is the perfect compliment to the deep cinnamon. The best semi-homemade cinnamon rolls :-)

Fast & Easy Cinna-Minnys

Ingredients:
Rolls:
1 can/tube Pillsbury Crescent roll sheet or rolls (seams pressed to form one sheet of dough)
1 ½ tablespoons soft butter
1/3 cup (packed) or ½ cup (unpacked) light brown sugar
1 ½ tablespoons cinnamon

Icing:
¼ brick cream cheese (softened)
2 -3 teaspoons butter (softened)
3 tablespoons powdered sugar
Tiny splash vanilla

Directions:
Preheat oven to 350-degrees. Butter dough sheet leaving ½ inch of one long side of dough butter-free. Stir brown sugar and cinnamon together in a bowl, then pour on top of buttered dough spreading filling evenly over butter but be careful to leave unbuttered strip along that one long side filling-free. Starting at long side where filling meets the edge of the dough, roll up dough jelly-roll style, keeping roll snug and pinch & seal log along the opposite, unbuttered/unfilled long edge. Cut into ½ inch slices and place cut-side down on stoneware or silpat/parchment lined baking sheet. Bake for 12-14 min or until light golden brown. Stir together all icing ingredients and smear the top of each mini-cinnamon roll with approx ½ teaspoon of cream cheese icing. Serve immediately.

Wednesday, February 3, 2010

"Oo la la! Le Toast Frenchais!" As Spoken by Darlene Conner

I love the TV show Roseanne - well, the older episodes, mostly. Those are the fun ones, when the kids are younger (before they 'jump the shark and win the lottery) - and my favorite one is where Roseanne has gone home to help her mom after her dad has had a heart attack. While she's gone, Jackie comes to stay at the house to help Dan take care of the kids and upon seeing french toast on the table one morning, Darlene exclaims, "Oo lala! Le toast frenchais!" I love it!

Anyway... I like giving my babydoll a hot breakfast and this morning, after deciding to make my toast frenchais, I thought, why not post it?! Some poeple don't really know how to make french toast and my daughter swears by mine so.... here we are ;-)The ingredients are simple, eggs, milk, sugar, vanilla, cinnamon.......

......and a pinch of salt.
Whisk it all together with a fork.....
Then, grab your bread of choice - which in my case this morning, was plain old, week old, white bread left over in the bread drawer. Melt some butter in a pan over medium heat.
Place the bread in the egg mixture and use a fork to poke the bread to help it soak up the sweet, eggy gooodenss.
Flip it over and do the same to the other side......
...then lay it in the hot pan and listen to it sing!
Then slide in a friend 'cuz it's just better that way.
After about 2 minutes (when the toast has browned nicely on the bottom and dry to the touch), flip each slice over to cook another minute or so on the raw/wet side. Mmmmmm....look how golden it is....
Sprinkle on some powdered sugar - my daughter likes it that way :-) Then pour on yer hot syrup. You MUST warm the syrup....you wouldn't serve hot mashed taters with cold gravy woud'ja?! That's crazy talk!
Mmmmm...it's hot, crispy and tender....just the best.....!
But the other best part? Having my daughter say, "Thanks, Mom...that was sooo good!" :-)

My true pleasure, baby - I love you!!!

French Toast

Ingredients:
1 pat of butter
4 slices white bread (stale-ish)
2 eggs
2 Tablespoons milk
1 teaspoon vanilla
1-2 teaspoons cinnamon
1 Tablespoon sugar
pinch of salt

Directions:
Whisk all ingredients except the bread in a shallow pan or pie plate. Melt 1 pat of butter in a skillet over medium heat. Place 1 to 2 lsices of bread (whatever fits) into the beaten egg mixture and poke at bread with fork to help absord mixture. Flip slices over and do the same to the other side. Lay slices into melted butter in hot skillet and cook approx 2 minutes or until cooked-side of bread is golden and dry-ish to the touch. Turn slices over and cook an additional 1 to 2 minutes. Plate and serve with warmed syrup, powdered sugar and butter if desired.